
The Google Tag Manager is a tool that has actually been available since 2012, but it has slowly been updated and gained some popularity in the industry over the past few years. The idea behind the tool is that anyone can keep their tags—Google AdWords, Analytics, AdRoll, etc.—organized and can edit tags even if they don’t know anything about coding. In other words, it’s a great tool for beginners and those who are not working with a developer.
How the Google Tag Manager Works
A quick rundown on how tags work: There are code snippets associated with different tags on your website, including the tags mentioned above. These different snippets of code help you measure traffic, monitor and run campaigns, learn about user behavior, and more. You can use some of the most basic tags such as Google Analytics and AdWords, or you can use tags such as Crazy Egg or SEMRush to gain even more data. If you want to customize a tag you can, but in all of these cases there will be code snippets associated that need to be correctly applied. This is where the Tag Manager comes into play for those who don’t know how to work with these snippets.
Again, the Google Tag Manager is all about managing or debugging codes without having any coding experience; however, it’s worth noting that with the Tag Manager you can also change configuration values to any mobile apps you’ve created (ad position, pause, gameplay, etc.). Visit this video for more information from Google.
Getting Started with the Google Tag Manager
For many, it helps to get started with the Tag Manager to really understand how it can be beneficial. Below examples how to get started along with screenshots from this article I wrote on Search Engine Journal last year:
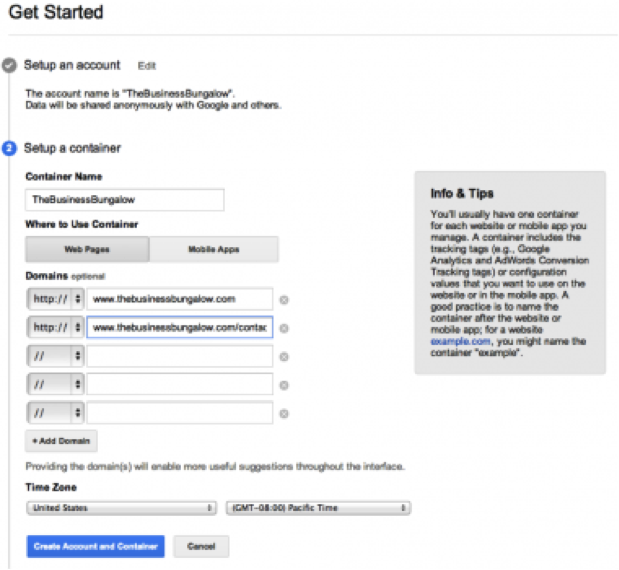
- Create an account. You do this by signing in here.
- Add a Container. Most companies will have a container for each website and each mobile app, and each container will include tracking tags (such as Analytics or AdWords), which you can add in the next step.
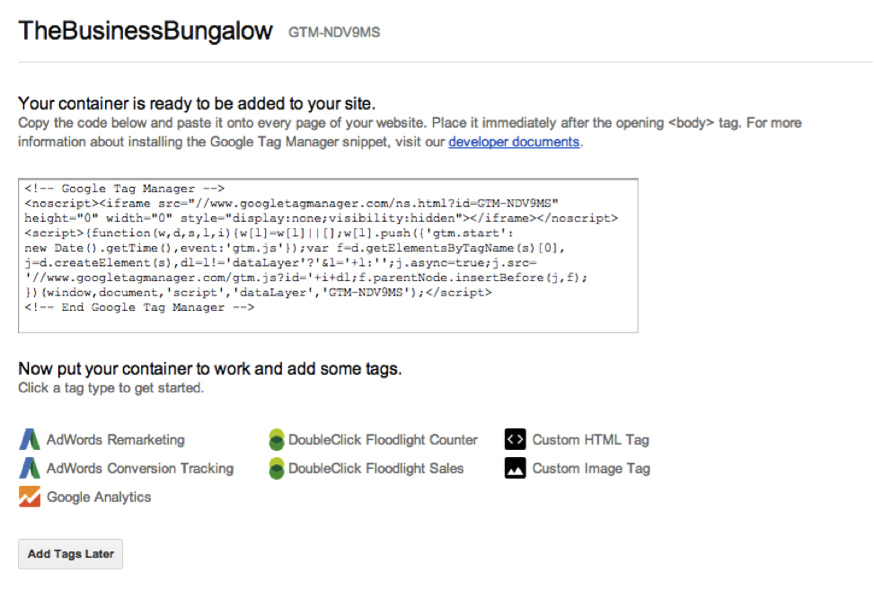
3. Add a code snippet to your site. You will then have a snippet of code that is generated based on the container you created. Use this code onto every page of your website where you may want to use the Tag Manager. You can also add tags (again, AdWords, Analytics, DoubleClick Floodlight, etc.) to your container at this point.
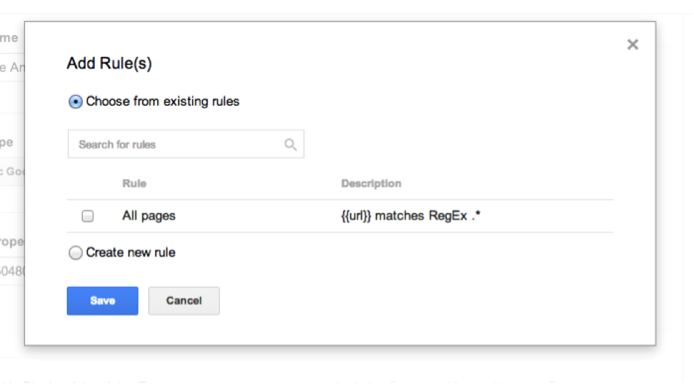
4. Add a firing or blocking rule. Whenever you click on one of the tags in the last section, you will have the option to add a firing rule or a blocking rule. This means that you can tell the Google Tag Manager certain rules about certain pages. Read about how to use rules to your advantage here.
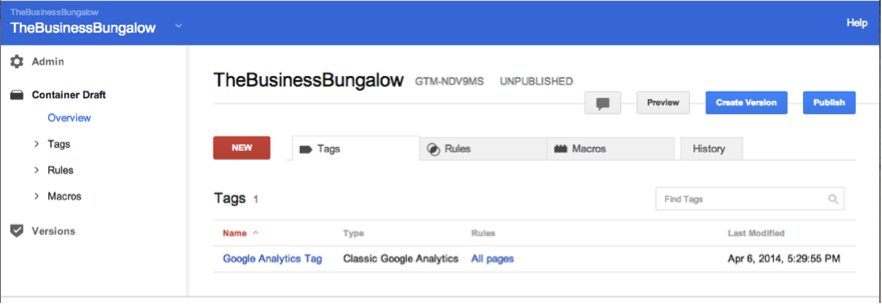
5. See a preview and publish. Once your container is published, you will have a Tag Manager dashboard where you can go and make changes if needed. This will then give you another code if you’d like to make changes.
Ultimately, creating a set of codes for your website can help you access all of your data in one place instead of having to move from a Google Analytics dashboard to an AdWords dashboard, etc. Because no coding experience is needed, I think you’ll find that once you use this tool it’s very easy to keep adding on more tags and getting more advanced with some of the options Google has to offer.
Have you ever used the Google Tag Manager? Let us know your experience and your thoughts in the comment section below.