Sometimes breaking down some of the Google Analytics features is the best way to really understand how they all work and what you can do to improve your SEO. URL Destination Goals is one feature that isn’t widely discussed, but can help you make big strides when it comes to your SEO efforts. The best part is that it’s easy to use and easy to edit if you change your focus or want to start getting more advanced. It won’t take you long to analyze your results either, so the sooner you can get started the better.
How URL Destination Goals Works and What Types of Goals to Create
Setting up a goal works exactly how it sounds. You can think about what you want your traffic to do when they get to your website, which can be your goal, and then you can track that. The best example is setting a goal of getting more people to visit a certain page (most likely a page that has a high conversion rate). By setting a goal, Google Analytics will gather data to help you see how users got to that page, which will help you know where to optimize in the future.
When it comes to goals for SEO, the best thing you can do is set goals for specific pages to see who is visiting what pages and when. You can then create a funnel for your goal (discussed above) to see how people reached that page. If they reached the page through a blog post, promoted that post; if they reached the page through your Facebook, increase your Facebook activity.
Another way to use Goals that might be a little bit less about SEO but is still important is to track whether or not free trials are being used, if a newsletter is being downloaded, those who comment on the blog for the first time, and more. Learn more about how goals work to help give you a better idea below.
Getting Started with URL Destination Goals Step-by-Step
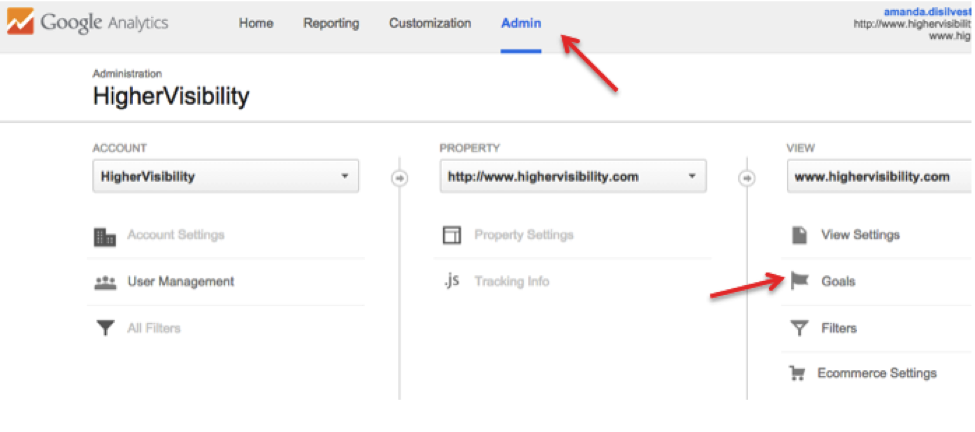
- Visit the Admin tab of the website you want to work with. Then, navigate to the Goals category on the right-hand side of the page under View.
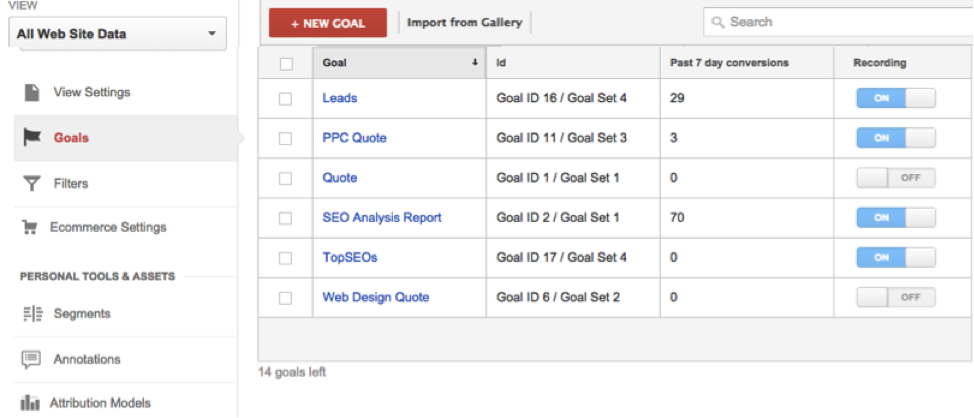
2. Once you’ve clicked on Goals, you will see the following page. Click +New Goal. Note: If you don’t have any goals setup yet, it will be blank.
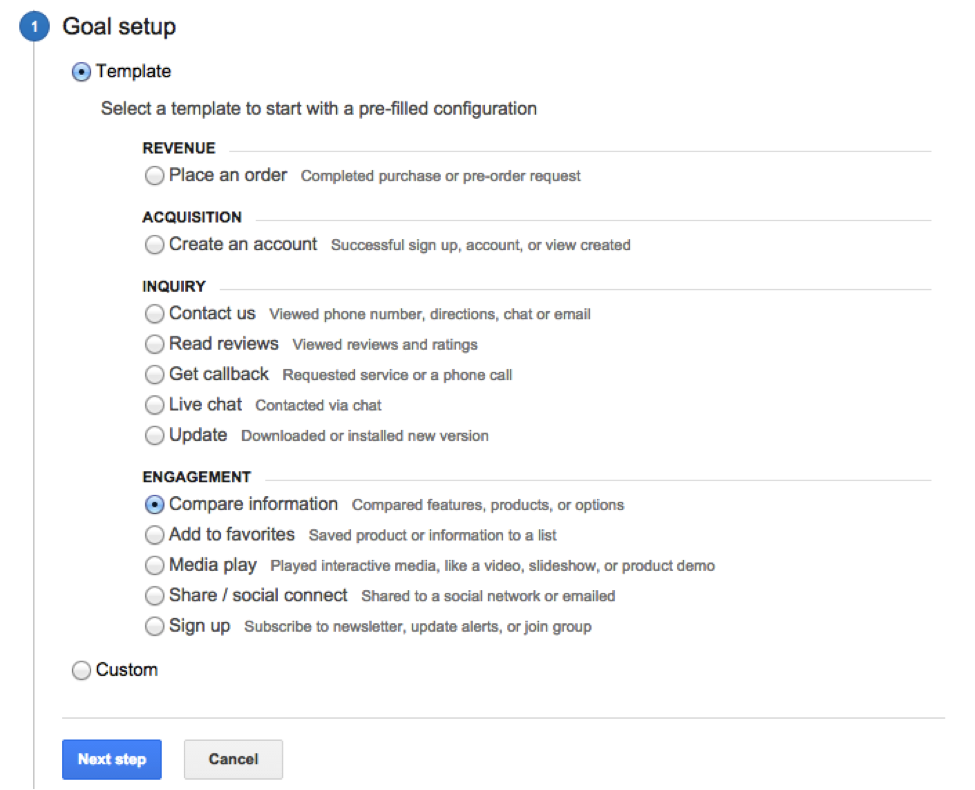
3. Now starts the first of three stages, Setup your Goal. The choice Compare Information is a popular one when it comes to SEO (as discussed above).
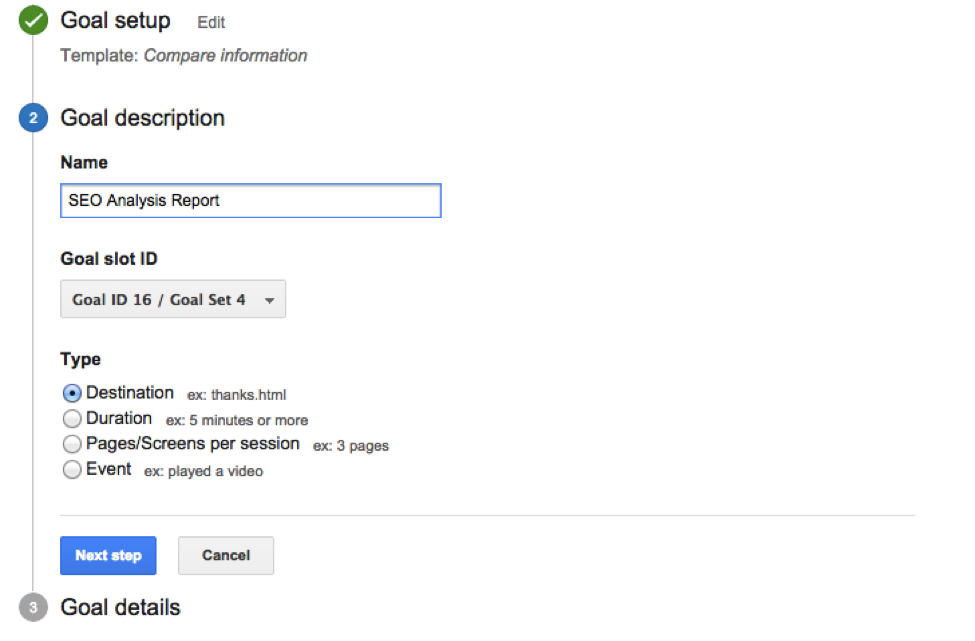
4. Create your Goal Description. You can create more than one goal; so adding in a description (and a good one) is essential to stay organized. Setting a Goal slot will also help you stay organized, and be sure to choose the correct type of Goal you’re trying to measure.
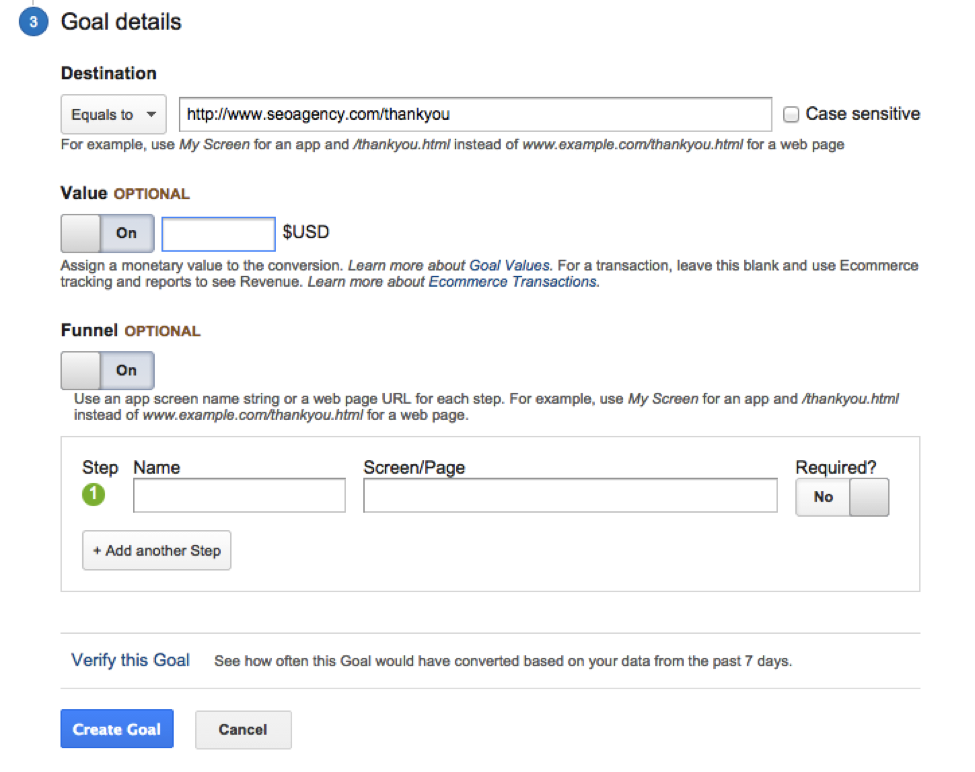
5. Next comes Goal Details. Here you will see three options. First is Destination. This refers to where users will land when they complete your goal (for most this will be a Thank You page). Always choose the option Equals To if you have an exact URL.
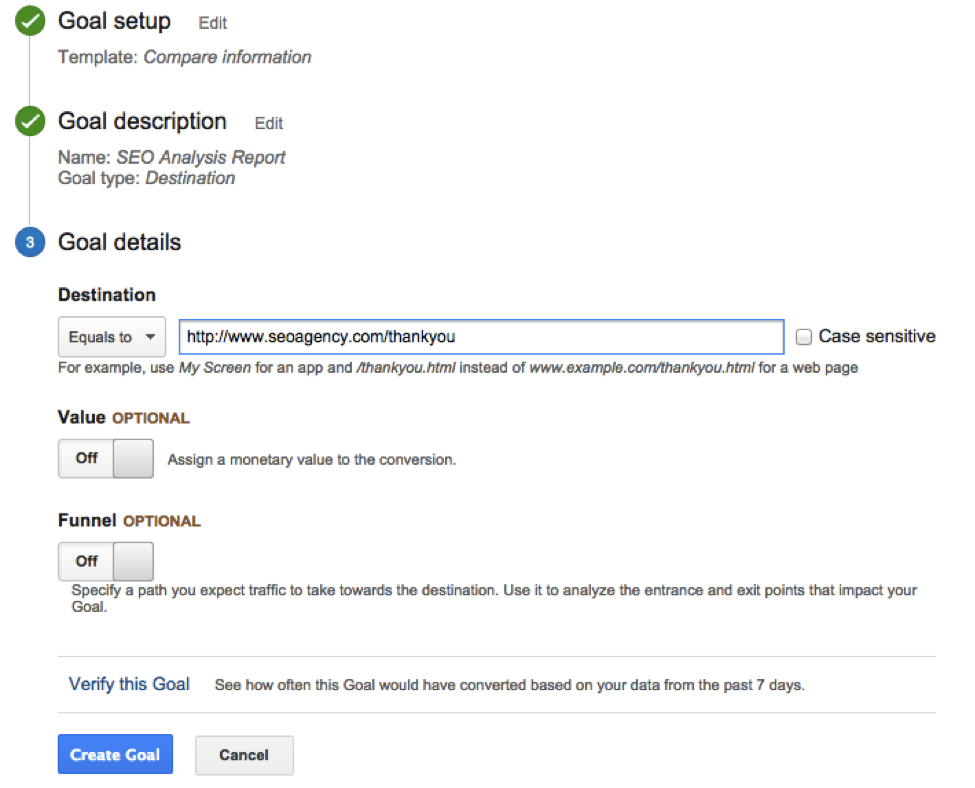
- On that same page, you can then assign a Monetary Value to the conversion or setup or a Funnel. A funnel is worth it for SEO sometimes to see how traffic might end up completing your goal. For example, you can use it to analyze the entrance and exit points that people took that led to completing your goal, which can help you optimize those pages or that path further in the future.
It’s as simple as that! Once your goals are created, you have the ability to easily turn them on or off, which is shown in the screenshot in point 2. You’ll quickly be able to see the last 7-day conversions for each goal so you’ll know what’s successful and what is falling behind.
It’s also worth noting that you can only create 4 sets of Goals for each domain and then 5 Goals for each set. Therefore, many companies have one set for SEO and another for PPC, web design, etc. For more information, visit the official Google Analytics Help page regarding goals.
Have you setup any great goals in your Google Analytics that have helped your SEO? Let us know in the comment section below.